Snapshots are copies of your sandbox Vaults that store the Vault’s configuration and data at a given point in time. Your organization can use snapshots to create and refresh sandbox Vaults. This helps reduce the time and effort required to generate sandboxes for testing or development. For example, instead of using Test Data Packages or Vault Loader to transfer data to a UAT Vault, you can create a UAT Vault from a snapshot.
The following types of snapshots exist:
- Configuration Snapshots: Only contain the configuration of the source sandbox, similar to configuration sandboxes. User references are not maintained.
- Data Snapshots: Contain configuration, data, and content from the source sandbox, maintaining user references.
Data snapshots make a complete copy of the sandbox with the following exceptions:
- Audit logs are not copied
- Vault Connections are reset (similar to sandboxes themselves)
- Vault Token records are reset
- The Scheduled Data Export job is reset
- Legacy Collaborative Authoring settings are cleared. Snapshots copy the settings for enhanced Collaborative Authoring configurations only.
When a sandbox is created from a data snapshot, only Vault Owners are notified via welcome email.
After rebuilding a sandbox from a data snapshot, any Connections and the Scheduled Data Export job need to be reconfigured.
Snapshot Limits
Veeva provides two (2) snapshots for each sandbox, regardless of size. For example, if your production Vault has three (3) Small and two (2) Large sandboxes, a total of ten (10) snapshots are allowed.
A Data Snapshot cannot be created if its source sandbox exceeds the size limits below. Content size limits exclude data in your Vault’s file staging.
- Small: Allows 100,000 total object records, 10,000 document versions, and 50 GB of content
- Medium: Allows 1,000,000 total object records, 100,000 document versions, and 50 GB of content
- Large: Allows 10,000,000 total object records, 100,000 document versions, and 50 GB of content
- Very Large: Allows 10,000,000 total object records, 100,000 document versions, and 50 GB of content
- Extra Large: Allows 10,000,000 total object records, 100,000 document versions, and 50 GB of content
- Full: Allows 10,000,000 total object records, 100,000 document versions, and 50 GB of content
You can only create snapshots for sandbox Vaults, excluding pre-release sandboxes. However, you can create pre-release sandboxes from snapshots.
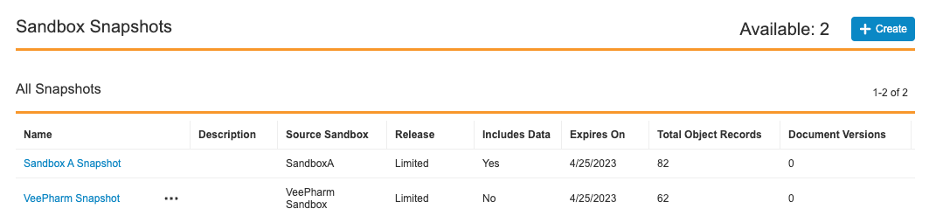
Viewing Snapshots
To view existing and available snapshots, navigate to Admin > Deployment > Sandbox Snapshots. The number of available snapshots is displayed in the top right corner of the page.
The All Snapshots section provides snapshot details for sandboxes of which the current Vault is a direct or indirect parent, including snapshots created from a source other than the current Vault.
Snapshot Releases
Snapshots can retain details about the Vault’s release when the snapshot was created. This information is important to know in the following scenarios:
-
When using a General Release snapshot to produce a Limited Release Vault
-
When attempting to use a Limited Release snapshot to produce a General Release Vault, which is prohibited
Snapshot Expiration
Vault assigns a snapshot the same release version as its source sandbox Vault upon creation. However, as time progresses, the snapshot release version will fall behind that of the source sandbox Vault. Automatic snapshot expiration prevents the need for snapshots to be upgraded across multiple releases.
Snapshots expire automatically if unused for a period of time. Updating or upgrading a snapshot updates its Expires On date. Vault Owners are notified via email seven (7) days prior to a snapshot’s expiration. This warning is also visible on the Sandbox Snapshots page. For example, a snapshot created from a general release sandbox with the version 22R3.0 will expire just prior to the 23R2.0 release. Alternatively, a snapshot created from a limited release sandbox with the version 22R3.2 will expire soon after the 23R1.0 release.
The following table displays the exact dates of snapshot expiration:
| Vault Release | General | Limited |
|---|---|---|
| 1.x | November 14th | August 15th |
| 2.x | April 4th | December 5th |
| 3.x | July 25th | April 25th |
Creating Snapshots
To create a new snapshot:
- From the parent Vault of the sandbox you’d like to take a snapshot of, navigate to Admin > Deployment > Sandbox Snapshots.
- Click Create.
- Click Select Sandbox to select a Source. In the dialog, choose the name of the desired source Vault. Click Continue to return to the New Snapshot page.
- Enter the Name of the snapshot. Snapshot names must follow the same rules for Vault names as sandboxes.
- Provide a Description for the snapshot.
- Select whether to Include Data. If unchecked, the snapshot will only include configuration.
- Click Finish. The build process can take ten (10) minutes to six (6) hours depending on the size of the source sandbox. Users are unable to access the source sandbox while the snapshot is building. Admins receive a Vault and email notification when a snapshot has been successfully built.
Updating Snapshots
Updating a snapshot creates a new snapshot to replace an existing one. The new snapshot shares the same Name and Description. Similar to refreshing a sandbox, updating a snapshot overwrites its configuration and optional data with the latest from the source sandbox Vault. This action also updates the expiration date of the snapshot.
How often you can update a snapshot depends on the size of the source sandbox:
- Small: Up to five (5) times in a 24-hour period
- Medium: Once in a 24-hour period
- Large: Once in a 24-hour period
- Very Large: Once in a 24-hour period
- Extra Large: Once in a 24-hour period
- Full: Once in a 24-hour period
How to Update a Snapshot
To update a snapshot:
- In the snapshot’s source sandbox Vault, navigate to Admin > Deployment > Sandbox Snapshots.
- From the Actions menu of the snapshot, select Update.
- A message appears to warn you that a new snapshot will be created to replace the current snapshot. Click Confirm. The build process can take ten (10) minutes to six (6) hours depending on the size of the source sandbox. Users are unable to access the source sandbox while the snapshot is building. Admins receive a Vault and email notification when a snapshot has been successfully built.
Upgrading Snapshots
Upgrading a snapshot changes the sandbox release version to match that of the source sandbox Vault. This action is only available when the snapshot has an Upgrade Status of “Upgrade Required” or “Upgrade Available”. An Upgrade Status of “Expired” indicates the snapshot hasn’t been upgraded before its expiration date.
How to Upgrade a Snapshot
To upgrade a snapshot:
- In the snapshot’s source sandbox Vault, navigate to Admin > Deployment > Sandbox Snapshots.
- From the Actions menu of the snapshot, select Upgrade.
- A message appears to inform you that the snapshot will be upgraded to the appropriate release version. Click Confirm to start the upgrade process.
This process can take anywhere from one (1) to ten (10) hours depending on the size of your Vault. The snapshot will be unavailable while it’s being upgraded. Admins receive a Vault and email notification when a snapshot has been successfully upgraded.
Deleting Snapshots
Existing snapshots can be deleted once they are no longer in use or to increase the total number of available snapshots. You can delete snapshots along with their source sandbox or retain them for later use. You cannot recover deleted snapshots.
You can delete a snapshot after a certain period depending on the size of the source sandbox:
- Small: Anytime after creation
- Medium: 24 hours after creation
- Large: 24 hours after creation
- Very Large: 24 hours after creation
- Extra Large: 24 hours after creation
- Full: 24 hours after creation
How to Delete a Snapshot
To delete a snapshot:
- In the snapshot’s source sandbox Vault, navigate to Admin > Deployment > Sandbox Snapshots.
- From the Actions menu of the snapshot, select Delete.
- A message appears to inform you that the snapshot will be deleted and it cannot be reverted. Click Confirm to start the deletion process. Admins receive a Vault and email notification when a snapshot has been successfully deleted.
Retaining Snapshots
When a sandbox with associated snapshots is deleted, Vault provides the option to move the snapshots to a new source sandbox.
The Change Source Sandbox action allows you to retain snapshots for future use and prevents the need to run multiple obsolete sandboxes. You can select any sandbox that appears in the Active Sandbox Vault section or a parent sandbox as the new source sandbox. Any sandboxes already associated with two snapshots are grayed out for selection.
Note: The source sandbox and snapshot must be on the same release. For example, you cannot move a limited release snapshot to a general release sandbox.
How to Change the Source Sandbox
To change a snapshot’s source sandbox:
- In the snapshot’s source sandbox Vault, navigate to Admin > Deployment > Sandbox Snapshots.
- Select Change Source Sandbox from the snapshot’s Actions menu.
- The Change Source Sandbox dialog opens. Select a new sandbox.
- Click Confirm.
The page will refresh and display the snapshot under its new source sandbox. Data and Configuration in the Snapshot will remain the same.
Configuration Reports
When a Snapshot is created, Vault also creates a Vault Configuration Report for that snapshot. To view it, users with appropriate permissions can click the Actions menu for a snapshot and select Download Configuration Report.
Related Permissions
By default, administration options for sandbox snapshots are only available to Vault Owners. To grant access to other users, use a custom security profile with the following permissions:
| Type | Permission Label | Controls |
|---|---|---|
| Security Profile | Admin: Sandbox Snapshots: Read | Ability to view snapshots and Configuration Reports in the Admin > Deployment > Sandbox Snapshots page |
| Security Profile | Admin: Sandbox Snapshots: Create | Ability to create snapshots in the Admin > Deployment > Sandbox Snapshots page |
| Security Profile | Admin: Sandbox Snapshots: Edit | Ability to update and upgrade snapshots in the Admin > Deployment > Sandbox Snapshots page |
| Security Profile | Admin: Sandbox Snapshots: Delete | Ability to delete snapshots in the Admin > Deployment > Sandbox Snapshots page |